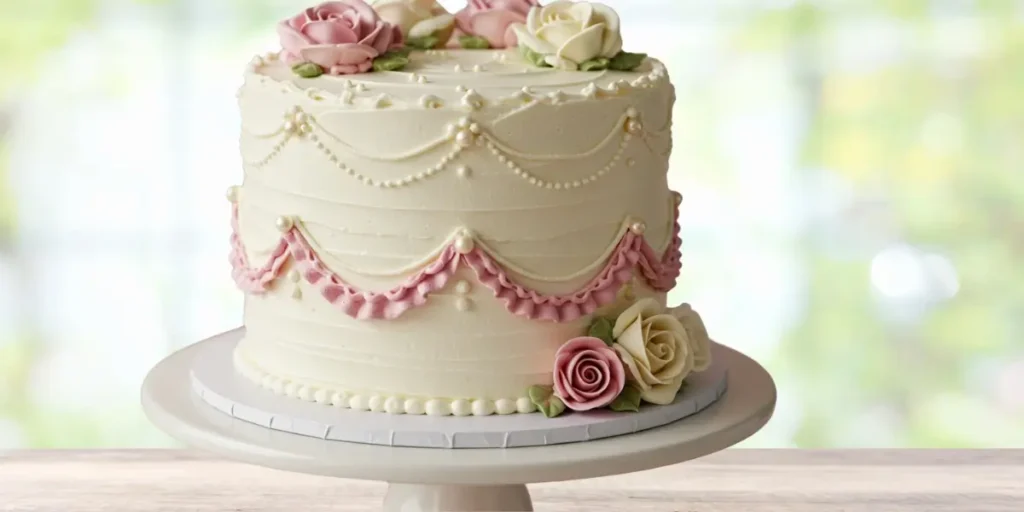
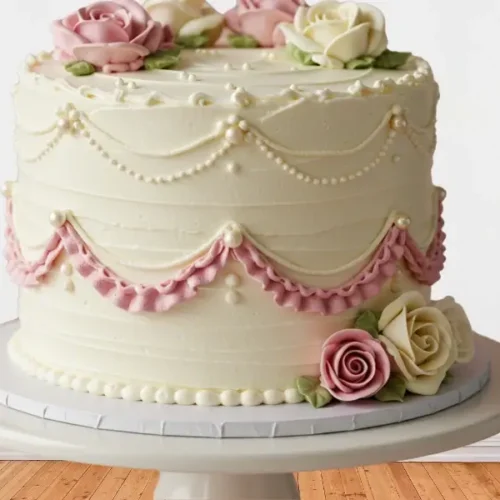
Hey there, fellow bakers! Have you ever scrolled through Instagram drooling over those fancy cakes that look like they belong in a royal palace? Well, guess what – you can make one yourself! Today we’re diving into the Vintage Birthday Cakes, a total showstopper that combines rich chocolate layers with dreamy Bavarian cream and gorgeous buttercream decorations. Don’t let the elegant look intimidate you – I’m breaking this down step by step so you can create this beauty in your kitchen. Whether you’re celebrating a birthday or anniversary, or just want to flex your baking muscles, this cake is guaranteed to make everyone say “WOW!” Let’s get started!

Quick Links
What You'll Find in This Guide
Chocolate Cake
Chocolate Cake Ingredients:
For that perfect chocolate base, round up:
- 2 cups (250g) all-purpose flour
- 3/4 cup (75g) unsweetened cocoa powder
- 2 cups (400g) sugar
- 1/2 cup (120ml) vegetable oil
- 1 cup (240ml) milk
- 3 eggs
- 1 tsp vanilla extract
- 2 tsp baking powder
- 1 tsp baking soda
- 1 cup (240ml) hot water
Chocolate Cake Preparation:
Time to get baking!
- Preheat your oven to 350°F (175°C) and prep your cake pans with a little butter and flour – this prevents that heartbreaking moment when your cake refuses to come out of the pan!
- Mix the flour, cocoa powder, sugar, baking powder, and baking soda in a large bowl.
- Add the eggs, milk, oil, and vanilla extract, then beat until everything’s combined.
- Here’s the secret to super-moist chocolate cake: slowly pour in the hot water while mixing. The batter will look thin – that’s exactly what you want!
- Pour the batter into your prepared pans and bake for 30-35 minutes. You’ll know it’s done when a toothpick comes out clean.
- Let those layers cool completely before slicing them evenly – patience pays off here!
Bavarian Cream
Bavarian Cream Ingredients:
For that cloud-like filling, gather:
- 2 cups (480ml) milk
- 1/2 cup (100g) sugar
- 4 egg yolks
- 2 tbsp cornstarch
- 1 tsp vanilla extract
- 1 cup (240ml) heavy cream
Bavarian Cream Preparation:
Let’s make that dreamy filling:
- Heat the milk in a saucepan over medium heat until warm but not boiling (we’re making cream, not coffee!).
- In another bowl, whisk together the egg yolks, sugar, and cornstarch until smooth.
- Slowly pour the warm milk into the egg mixture while whisking constantly – this is called tempering and keeps your eggs from scrambling. Nobody wants scrambled egg cake!
- Return the mixture to the stove and stir until it thickens.
- Add the vanilla extract and let it cool completely.
- Whip the heavy cream until stiff peaks form, then gently fold it into your cooled mixture for that perfect light-air texture.
Chocolate Ganache
Chocolate Ganache Ingredients:
Because more chocolate is always better:
- 200g dark chocolate
- 1/2 cup (120ml) warm heavy cream
Chocolate Ganache Preparation:
Easy peasy ganache:
- Chop the chocolate into small pieces (think chocolate confetti).
- Heat the heavy cream until warm, then pour it over the chocolate.
- Let it sit for a minute, then stir until smooth and glossy.
- Allow it to cool slightly before using – you want it pourable but not runny.
Buttercream Decoration
Buttercream Decoration Ingredients:
For those gorgeous decorations:
- 1 cup (200g) softened butter
- 4 cups (500g) powdered sugar
- 1/4 cup (60ml) milk or heavy cream
- 1 tsp vanilla extract
- A pinch of salt
- Pink food coloring (various shades)
Buttercream Preparation:
Time for the fun part:
- Beat the butter until super creamy – this is your foundation for smooth frosting!
- Gradually add the powdered sugar while mixing. Pro tip: start your mixer on low unless you want to look like you’ve been in a snowstorm!
- Add the milk, vanilla extract, and salt, and mix until smooth.
- Divide the buttercream and create different shades of pink – from barely-there blush to statement hot pink for a gorgeous gradient effect.
Vintage Princess Cake Decorating Tutorial
1. Preparing the Cake Before Decorating
- Cutting the Cake:
- Once the cake has cooled completely, slice it into three even layers using a long knife or dental floss.
- Filling the Cake:
- Place the first cake layer on a serving plate.
- Spread an even layer of Bavarian cream using an offset spatula.
- Add a thin layer of chocolate ganache on top and spread gently.
- Repeat the process with the second layer, then place the final cake layer on top.
- Chilling the Cake:
- Refrigerate the cake for 30 minutes to firm up before decorating.
2. Covering the Cake with Buttercream
- Preparing the Buttercream:
- Use smooth white buttercream as the base.
- Crumb Coat:
- Apply a very thin layer of buttercream to trap any crumbs.
- Use an offset spatula to smooth the top and sides.
- Chill the cake for 15 minutes to set.
- Final Coating:
- Spread another layer of buttercream evenly over the cake.
- Use a cake scraper to smooth the surface.
3. Step-by-Step Vintage Decorating
- Coloring the Buttercream:
- Divide the buttercream into three pink shades for a gradient effect.
- Place each color in a separate piping bag with a star tip (like 1M or 2D).
- Creating Side Ruffles:
- Use the darkest pink shade for the bottom ruffles.
- Pipe wavy lines along the sides using an up-and-down motion.
- Repeat with lighter pink shades as you move upward.
- Adding Borders & Swirls:
- Use a fine piping tip to draw delicate swirl patterns along the cake’s edges.
- Pipe small circular details along the upper rim for an elegant touch.
- Adding Frozen Buttercream Flowers:
- Pipe buttercream flowers on parchment paper and freeze them for 15 minutes.
- Once firm, gently place them on the cake in decorative clusters.
- Finishing Touches:
- Add pearl sprinkles around the design for a luxurious look.
- Drizzle a bit of ganache over some flowers for a glossy finish.
Final Step:
Refrigerate the cake for 15 minutes to maintain its shape, then serve and enjoy!
The Lost Art of Vintage Birthday Cakes: Recreating Grandma’s Best Recipes
Ingredients
Chocolate Cake Ingredients:
- 2 cups 250g all-purpose flour
- 3/4 cup 75g unsweetened cocoa powder
- 2 cups 400g sugar
- 1/2 cup 120ml vegetable oil
- 1 cup 240ml milk
- 3 eggs
- 1 tsp vanilla extract
- 2 tsp baking powder
- 1 tsp baking soda
- 1 cup 240ml hot water
Bavarian Cream Ingredients:
- 2 cups 480ml milk
- 1/2 cup 100g sugar
- 4 egg yolks
- 2 tbsp cornstarch
- 1 tsp vanilla extract
- 1 cup 240ml heavy cream
Chocolate Ganache Ingredients:
- 200 g dark chocolate
- 1/2 cup 120ml warm heavy cream
Buttercream Decoration Ingredients:
- 1 cup 200g softened butter
- 4 cups 500g powdered sugar
- 1/4 cup 60ml milk or heavy cream
- 1 tsp vanilla extract
- A pinch of salt
- Pink food coloring various shades
Instructions
Chocolate Cake Instructions:
- Preheat your oven to 350°F (175°C) and grease and flour your cake pans.
- In a large bowl, mix the flour, cocoa powder, sugar, baking powder, and baking soda.
- Add the eggs, milk, oil, and vanilla extract. Beat until smooth.
- Gradually add the hot water while mixing to form a thin batter.
- Pour the batter into prepared pans and bake for 30-35 minutes.
- Let the layers cool completely before slicing them evenly.
Bavarian Cream Instructions:
- Heat the milk in a saucepan over medium heat until warm (not boiling).
- In a separate bowl, whisk the egg yolks, sugar, and cornstarch until smooth.
- Gradually add the warm milk to the egg mixture, whisking constantly to avoid scrambling the eggs.
- Return the mixture to the heat and stir until it thickens.
- Add vanilla extract and let the mixture cool completely.
- Whip the heavy cream until stiff peaks form, then gently fold it into the cooled mixture.
Chocolate Ganache Instructions:
- Chop the chocolate into small pieces.
- Heat the heavy cream until warm, then pour it over the chopped chocolate.
- Let the mixture sit for a minute, then stir until smooth and glossy.
- Let the ganache cool slightly before using.
Buttercream Instructions:
- Beat the butter until smooth and creamy.
- Gradually add the powdered sugar while mixing to avoid a sugar storm!
- Add milk, vanilla extract, and salt. Mix until smooth and well-combined.
- Divide the buttercream into different bowls and add food coloring to create shades of pink.
Cake Assembly and Decoration:
- Place the first cake layer on a serving plate.

- Spread a layer of Bavarian cream, followed by a drizzle of chocolate ganache.
- Repeat the process with the remaining layers of cake, Bavarian cream, and ganache.
- Chill the cake in the fridge for 30 minutes to set the layers.
- Cover the entire cake with buttercream, smoothing the surface with a spatula.
- Decorate the cake with piping patterns using buttercream and arrange frozen rose decorations on top.

- Add sugar pearls for an elegant touch.
Video
Notes
- The cake layers can be baked a day in advance to save time.
- Store leftover cake in the fridge for up to 3 days.
FAQs: Everything You Need to Know
What makes a cake vintage?
A vintage cake draws on classic, old-fashioned recipes and designs. It usually features:
Traditional ingredients and baking techniques
Nostalgic flavors and textures
Retro-style decorations that evoke a bygone era
How to make a flat birthday cake?
To make a flat birthday cake quickly and easily:
Preheat your oven to 350°F (175°C) and grease a round, flat cake pan.
In a bowl, combine dry ingredients like 2 cups flour, 1 1/2 cups sugar, and 2 teaspoons of baking powder.
In another bowl, mix wet ingredients such as 1/2 cup softened butter, 3 eggs, 1 cup milk, and 1 teaspoon vanilla extract.
Gradually add the dry mix to the wet mix until you achieve a smooth batter.
Pour the batter into the prepared pan, smoothing the top with a spatula to ensure even thickness.
Bake for about 25–30 minutes or until a toothpick inserted in the center comes out clean.
Allow the cake to cool before frosting and decorating.
Are vintage cakes hard to make?
Not necessarily, but they can require a bit more attention to traditional techniques and decorative details. If you enjoy classic recipes and a touch of nostalgia, practicing precise measurements and classic decoration methods will help make the process enjoyable.
What makes a cake look professional?
A cake looks professional when it showcases clean execution and attention to detail. Key elements include:
Uniform layers that are well-leveled, ensuring a balanced structure.
Smooth, even frosting achieved by using techniques like a crumb coat and proper icing tools.
Neat edges and sharp lines, often enhanced by using turntables and proper tools.
Thoughtful decorative touches that complement the overall design without overcrowding the cake.
Why are vintage cakes popular?
Vintage Cakes Popularity:
Vintage cakes are often beloved because they evoke a sense of nostalgia and comfort. They remind people of cherished memories and simpler times by using classic recipes and traditional decorations. Their authentic, time-honored appearance and flavor make them a favorite choice for both celebrations and everyday enjoyment.
Vintage Birthday Cakes
Ta-da! You’ve just created a Vintage Princess Cake that looks like it came straight from a fancy bakery! Don’t be surprised if your friends start asking you to make their birthday cakes from now on. The best part about this cake isn’t just how gorgeous it looks – it’s the amazing combination of moist chocolate cake, silky Bavarian cream, rich ganache, and those beautiful buttercream decorations that make every bite a royal experience.
Whether you nailed it on the first try or your roses look more like blobs (hey, they’re “artistic” blobs!), be proud of yourself for taking on this baking adventure. The more you practice those piping skills, the better you’ll get! So grab your fork, take a picture for the ‘gram, and enjoy every delicious bite of your princess-worthy creation. Happy baking, friends!
Don’t miss out—follow us on social media for updates:


1 thought on “The Visual Evolution of Vintage Birthday Cakes: From Simple to Spectacular”