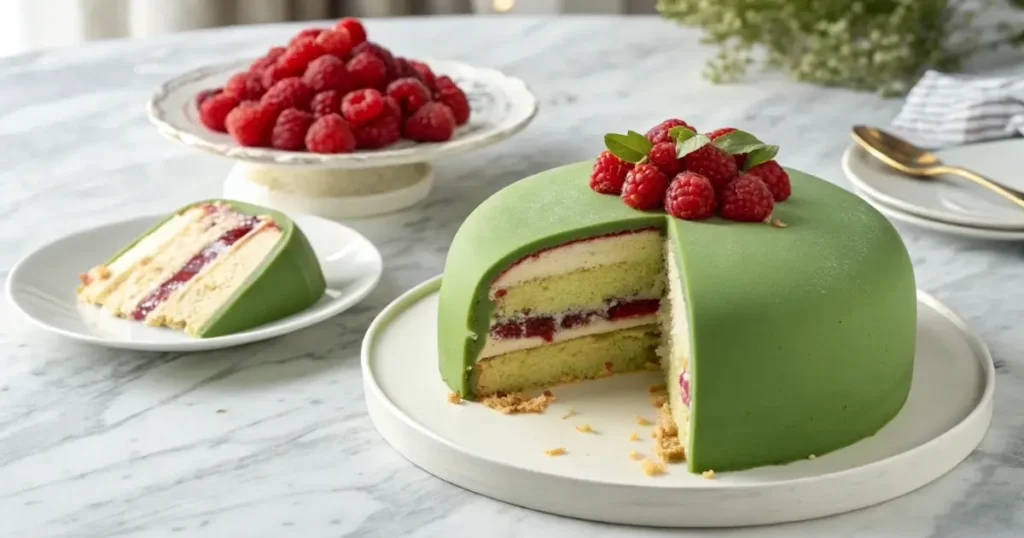
Have you ever scrolled through Instagram and spotted that gorgeous green dome cake that looks like it came from a fancy European bakery? That’s Princess Torte Cake (or “Princesstårta” if you want to impress your friends with your Swedish pronunciation skills). With its layers of sponge cake, jam, custard, and whipped cream all wrapped in a marzipan blanket, it looks like something that would get you Star Baker on a baking show—but I promise it’s doable in your home kitchen!
This cake might look intimidating, but think of it as a layer cake that went to finishing school—elegant, refined, and ready to make you look like a baking genius. So please put on your favorite playlist, clear some counter space, and let’s bring a slice of Sweden into your kitchen!

Quick Links
What You'll Find in This Guide
The Royal Backstory (The 30-Second Version)
In the early 1900s, a Swedish cooking teacher created this cake for three Swedish princesses: Margaretha, Martha, and Astrid. These royal ladies apparently couldn’t get enough of it (honestly, same), and it became so popular that it’s now Sweden’s national dessert.
Swedes love this cake so much that they even celebrate Princess Torte Cake Week every September. Yes, an ENTIRE WEEK dedicated to cake. I don’t know what will if that doesn’t convince you that Swedes have life figured out.
What You’ll Need for Your Princess Torte Cake
For the Sponge Cake (The Foundation):
- 4 large eggs (room temperature works best)
- 1 cup (200g) granulated sugar
- ½ cup (120ml) whole milk (2% works in a pinch)
- ½ cup (115g) unsalted butter, melted and slightly cooled
- 1½ cups (180g) all-purpose flour (just the regular stuff)
- 1½ tsp baking powder (check that expiration date!)
- 1 tsp vanilla extract (the real stuff makes a difference)
- Pinch of salt (just a little!)
For the Custard Filling (The Creamy Dream):
- 2 cups (480ml) whole milk
- 4 egg yolks (save those whites for an omelet tomorrow)
- ½ cup (100g) granulated sugar
- ¼ cup (30g) cornstarch (this is the magic thickener)
- 1 tsp vanilla extract
- ½ cup (120ml) heavy cream (for folding in later)
For the Whipped Cream (The Fluffy Cloud):
- 2 cups (480ml) heavy cream (cold from the fridge)
- 2 tbsp powdered sugar
- 1 tsp vanilla extract
The Final Touches:
- ½ cup (120g) raspberry jam (seedless is best unless you enjoy the crunch)
- 12 oz (340g) marzipan (traditionally green, but you do you)
- Powdered sugar for dusting (and covering any mistakes!)
- Fresh raspberries (optional but pretty)
Let’s Get Baking!: how to make a princess cake
Step 1: Bake Those Cake Layers
- Preheat your oven to 350°F (175°C) and grease two 8-inch round cake pans. If you have parchment paper, line the bottoms—trust me, it makes life easier.
- Beat the eggs and sugar until fluffy and almost triple in volume. This might take 5-7 minutes with an electric mixer. Don’t rush this step—it makes your cake light and airy instead of dense and sad.
- Stir in the milk, melted butter, and vanilla extract. The mixture might look a little weird at this point—like it’s separating—but don’t panic! It’ll all come together.
- Sift in the flour, baking powder, and salt and fold them in gently. Think of it like tucking the flour into a blanket of egg fluff—gentle, gentle. Overmixing is the enemy here!
- Divide the batter between your pans and bake for 25-30 minutes. They’re done when they’re golden on top and a toothpick comes out clean.
- Let them cool completely. Don’t rush this, or your cream layers will melt faster than a snowman in Florida.
Step 2: Make the Custard (While Your Cakes Are Cooling)
- Heat the milk until it’s warm but not boiling. Think hot tub temperature, not lobster pot.
- Whisk egg yolks, sugar, and cornstarch in a separate bowl until smooth and slightly lighter in color.
- Gradually add the warm milk to the egg mixture while whisking constantly. This is called tempering the eggs, and it prevents you from making accidental scrambled eggs (not what we’re going for).
- Return everything to the saucepan and cook over low heat, stirring constantly, until it thickens enough to coat the back of a spoon. This might take 5-7 minutes—patience is key!
- Remove from heat, add vanilla, and let it cool completely. Pro tip: cover with plastic wrap touching the surface to prevent that weird skin from forming.
- Once cool, whip that ½ cup of heavy cream to soft peaks and fold it into the custard. This makes it lighter and more mousse-like. Game changer!
Step 3: Assembly Time (Where the Magic Happens)
- Place one cake layer on your serving plate. Pro tip: put strips of parchment paper under the edges to keep your plate clean during decorating. Remove them before serving, and everyone will think you’re a neat freak.
- Spread raspberry jam over the cake. Don’t go all the way to the edge—leave about a ½-inch border to prevent jam escape.
- Layer on that gorgeous custard, about ½-inch thick. Smooth it out, but again, leave a small border.
- Top with the second cake layer, pressing down very gently. You’re not trying to squish filling out the sides—just making sure everything’s secure.
- Whip the heavy cream with powdered sugar and vanilla until it forms stiff peaks. It should be firm enough to hold its shape but not so stiff that it looks chunky.
- Pile that whipped cream on top of the cake, creating a dome shape. Use an offset spatula or the back of a spoon to smooth it out. Don’t worry about perfection—the marzipan will cover any bumps.
Step 4: The Marzipan Moment (Deep Breaths!)
- Dust your work surface with powdered sugar and roll out the marzipan into a circle about 14-15 inches wide and ⅛-inch thick.
- Gently lift the marzipan (a rolling pin helps here) and drape it over your cake. This is like putting a blanket over a sleeping baby—do it with confidence but be gentle!
- Smooth the marzipan over the dome, working from the top down. Small wrinkles can be smoothed out with warm hands.
- Trim the excess from the bottom with a sharp knife or pizza cutter.
- Dust lightly with powdered sugar for that classic Princess Cake finish.
- Optional: Add a small marzipan rose or fresh raspberries on top. Or both! You’re the royalty here—do what makes you happy!
When Things Go Wrong (Because Sometimes They Do)
- Custard too runny? Pop it back on the stove for a few more minutes of cooking, or add an extra teaspoon of cornstarch mixed with cold milk.
- Marzipan tearing? Patch it up with scraps and cover the evidence with extra powdered sugar. It’s like a concealer but for cakes!
- Whipped cream won’t hold its shape? Your cream might be too warm. Chill the bowl and cream in the freezer for 10 minutes, then try again.
- Cake layers uneven? That’s what the custard and whipped cream are for—they’re like edible spackling paste!
- No time for all these steps? Buy a plain white cake, slice it in half, add store-bought custard and whipped cream, and cover with marzipan. We won’t tell!
Serving Your Masterpiece
Refrigerate your Princess Torte Cake for at least an hour before serving—this helps everything set and makes it easier to slice. When it’s time to serve, use a sharp knife dipped in hot water and wiped dry between cuts for clean slices.
Bring the cake to room temperature for about 20 minutes before serving for the best flavor and texture. Cold cake is sad cake!
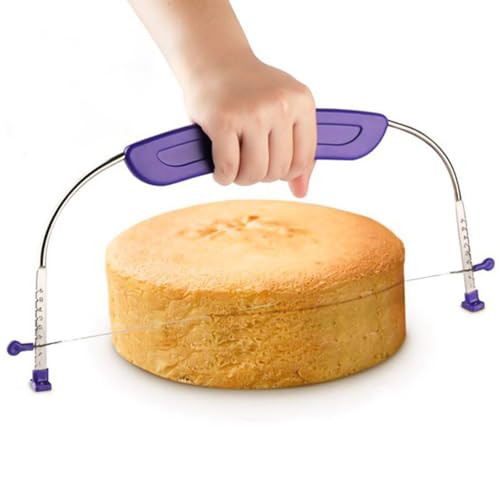
- Well Design: Thickened and widened handle, smooth and rounded edges, elegant and modern silver appearance, brings better…
- Premium Material: Made of high quality stainless steel, no rust, no corrosion, no bending; the standard material can be …
- Good Practicality: The extended knife head and the uniform serrated blades make cutting larger cakes faster. The widened…
Why is it called a princess torte?
The princess torte is named for its elegant, layered design and soft pink hues that evoke the grace and charm of a princess, making it a perfect treat for regal celebrations.
What is the difference between a torte and a cake?
The main difference is that a torte is typically denser and more layered, using little flour and often including ground nuts or breadcrumbs, while a cake is lighter and fluffier, relying on more flour and leavening agents.
Where to buy Swedish Princess cake
Swedish princess cake, or prinsesstårta, is typically available at Swedish bakeries and patisseries. If you’re in Sweden, popular spots in cities like Stockholm and Gothenburg—such as Gateau or Vete‑Katten—offer this classic treat. Outside of Sweden, check Scandinavian bakeries or specialty dessert shops, or ask your local bakery if they can make one by request.
How to bake a princess cake
To bake a princess cake, begin by baking your cake layers—often a light sponge or a rich chocolate cake—until they are perfectly risen and fully cooled. While your cake rests, prepare a silky cream filling (like Bavarian cream) by gently heating milk, whisking egg yolks with sugar and cornstarch, and then folding in whipped heavy cream for a light texture. For an extra layer of decadence, create a smooth chocolate ganache by melting chopped dark chocolate in warm heavy cream. Assemble the cake by layering your cake slices with the cream and ganache, then apply a thin crumb coat and chill to set the layers. Finally, cover the cake with a thick, smooth buttercream—often tinted in a soft, princess-pink—and top it off with decorative piping or elegant garnishes, such as small buttercream roses or sugar pearls, for that regal finish.
What is in a princess cake?
A princess cake is a layered dessert featuring soft, moist cake layers paired with smooth, creamy fillings—commonly a custard or Bavarian cream, sometimes accented with chocolate ganache or a hint of jam. It’s usually enveloped in a beautifully tinted buttercream or marzipan icing and finished with elegant decorations like piped rosettes or sugar pearls to give it a regal, delicate appearance.
You Did It! (Yes, YOU!)
Look at what you just created! A gorgeous Swedish Princess Torte Cake that looks like it came from a fancy European bakery. This isn’t just dessert—it’s a conversation starter, a centerpiece, and definitive proof that you’ve got skills!
Whether you’re celebrating a birthday, or anniversary, or just surviving another Tuesday, this Swedish classic brings a touch of European elegance to your table. And when someone asks where you bought it, the look on their face when you say “I made it” is sweeter than any dessert could ever be.
So grab your mixing bowls, channel your inner Swedish baker, and get ready to feel like royalty. Crown optional, but highly recommended!


1 thought on “Elegant & Delicious: How to Make a Swedish Princess Torte Cake”